How are punchboards made at AGR?

If you are thinking about creating a board game with cardboard tokens, you will probably have questions from the very beginning: how to prepare the files, what bleed is, or how each token can be easily removed from the punchboard.
Although a token may seem like a simple component, its production requires graphic design, printing, gluing and die-cutting to work together correctly.
That is why we have prepared this guide, so you can understand, step by step, how punchboards are manufactured at AGR and what you need to have ready before sending us your files.
Everything starts before the design stage
Before opening any design software, you need to decide what the tokens will look like and how they will be presented in the game. These decisions affect both file preparation and the manufacturing process.
It is important to define aspects such as:
The size and shape of each token.
The number of tokens included in each game.
Whether the reverse side will be playable.
Once you have defined these points, you can start preparing the design.
Design: how to prepare your tokens correctly
You need to take into account the position of the cutting lines and the tolerances involved in the die-cutting process. For this reason, you can ask your prepress contact to provide you with the appropriate template, which will include all the tolerances required to achieve a good finish.
We recommend visiting our article RECOMMENDED PROGRAMS FOR DESIGNING YOUR BOARD GAME, where we explain which tools you can use to prepare your files correctly.
Basic file requirements
To ensure that we can work with your files correctly, they must meet the following requirements:

PDF format (PDF/X-3 recommended)
Resolution of 300 dpi
CMYK colour mode (not RGB)
Minimum bleed of 2.5 mm
Minimum internal safety margin of 2.5 mm
Minimum usable cutting margin of 8 mm
Minimum spacing of 5 mm between cutting blades
These requirements ensure that what you see on screen can be printed correctly.
What is bleed?
Bleed is the extension of the background or images beyond the line along which the token will be cut.
Die-cutting involves a small movement tolerance. If the design ended exactly on the cutting line, even the slightest deviation could leave a white or unprinted strip visible. Extending the background by at least 2.5 mm prevents this from happening.
What is the safety margin?
The safety margin is the distance that must be left between the cutting line and important design elements, such as text, numbers, icons or illustrations that must not be cut off.
We recommend leaving at least 2.5 mm. The closer an element is to the edge, the more noticeable any slight die-cutting deviation will be.
How to send us your files
Once your tokens have been designed, they need to be organised correctly before being sent to us.
We require five main files:
One file containing the front design.
One file containing the reverse design.
One file containing the front design with the die line overlaid.
One file containing the reverse design with the die line overlaid.
One file containing the vectorised die line.
What happens when we receive your files
Once you send us everything, we check every detail to make sure that all the requirements have been met:
That the images are of sufficient quality.
That the margins and bleed are correct.
And many other aspects to ensure that your game can be manufactured without any issues.
If we find any problems, we will let you know and help you resolve them.
The proof before printing
Before production begins, we send you a digital proof (e-proof) so that you can check everything. This is a key stage, as it is the last opportunity to identify any errors. We therefore always recommend reviewing it carefully, paying particular attention to:
The text.
The orientation of the tokens.
Visual details.
The side from which the punchboard will be die-cut, as specified in the technical datasheet.
Once you approve the file, it goes directly into production.
Production
The production process includes:
Printing the sheets.
Varnishing the sheets.
Gluing.
Die-cutting.
Printing the sheets
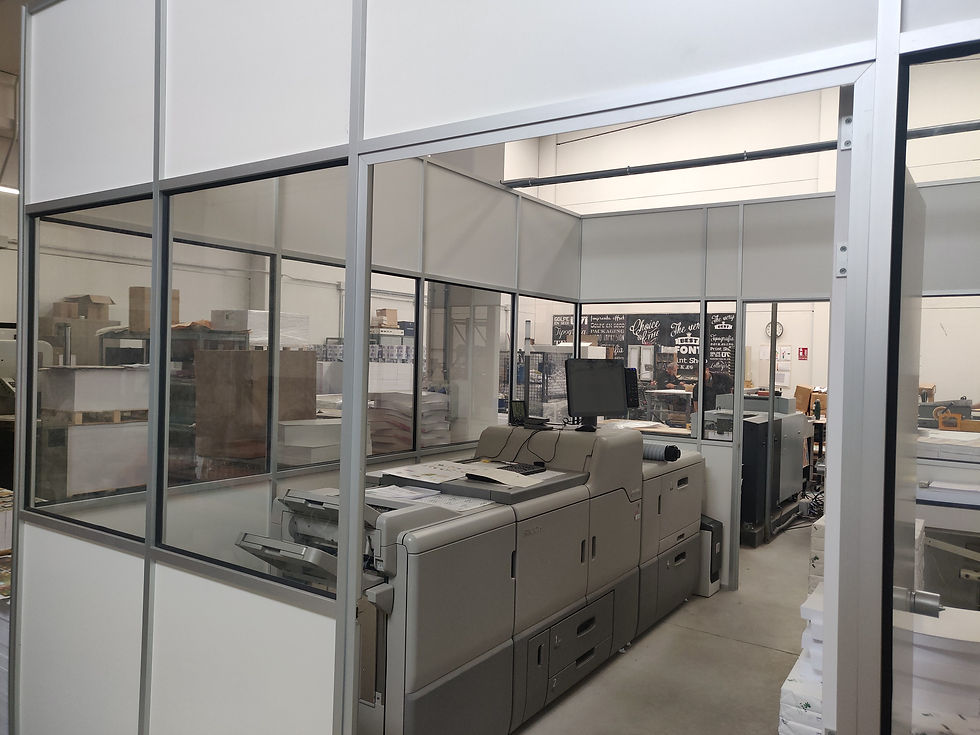
The tokens are not printed directly onto the cardboard. The designs are first printed onto sheets of paper, which are subsequently mounted onto the cardboard backing.
Depending on the characteristics and quantity of the project, either digital or offset printing technology may be used.
Varnishing

After printing, the sheets receive a layer of matt varnish that helps protect the ink during handling and use.
The varnish improves surface resistance to rubbing and provides a more uniform finish. However, it does not make the tokens waterproof or completely prevent marks caused by intensive use.
Gluing
Once the sheets have been printed and varnished, they are glued to the cardboard that gives the tokens their body and thickness.
One sheet is applied to each side of the cardboard, the front and the reverse. During this process, it is essential that both sheets are correctly registered so that the front and reverse designs align after die-cutting.
The assembled sheets then undergo a pressing process that allows the paper to adhere evenly to the cardboard, preventing bubbles, wrinkles or areas that have not been properly glued.
Die-cutting
Once the boards have been glued, the die-cutting process begins. A custom die manufactured specifically according to the shapes defined in the design is used for this purpose.
The board is placed in the die-cutting machine, where the die applies pressure to the material and makes the cuts required to define each token and the outer edge of the punchboard.
When the tokens are supplied within the punchboard, small connection points are left in place to keep them attached during handling, assembly and transport. These points allow users to remove the tokens easily afterwards.
It is normal for a small mark to remain where each token was attached to the punchboard.
Final preparation
Once completed, the punchboards are grouped together and prepared for assembly.
When all the components are ready, they are assembled to bring your game to life.

Do you have any questions?
If anything is unclear, you can contact your prepress representative. They will be happy to help you with anything you need.
With you, from square one


Comments